OpenGL の描画までの手順は、サンプル GL3_Text と下記のページを
参考にさせていただきました。
・white wheelsのメモ: Cocoaサンプル – OpenGLで描画
・Mac Developer Library: GL3 Text
Xcode 上で UI とオブジェクトの対応付けを行っていくスタイルのようです。
GLK はありますが GLKView はなく NSOpenGLView が用いられています。
Xcode 5 で OS X 用のプロジェクト “Cocoa Application” を作成。
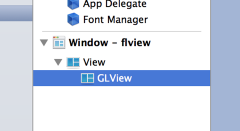
MainMenu.xib を選択して、GL3_Text を真似てシーンを作ってみます。
Window → View の下に Custom View をぶら下げます。
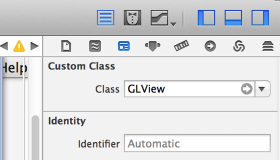
名称をとりあえず “GLView” に変更。
右サイドの Custom Class にも “GLView” と書き込んでおきます。
プロジェクトには OpenGL.framework を追加しておきます。
GLView.h を作成。
// GLView.h #import@interface GLView : NSOpenGLView @end
続いて GLView.mm を作成。
// GLView.mm
#import "GLView.h"

@interface GLView() {
    NSTimer*    mpTimer;
}

- (id)initWithFrame:(NSRect)frameRect;
- (void)reshape;
- (void)render;
@end

@implementation GLView

- (id)initWithFrame:(NSRect)frameRect
{
    mpTimer= NULL;

    static const NSOpenGLPixelFormatAttribute	attr[]= {
        NSOpenGLPFADoubleBuffer,
        NSOpenGLPFAAccelerated,
        NSOpenGLPFAColorSize,	24,
        NSOpenGLPFAAlphaSize,	8,
        NSOpenGLPFADepthSize,	24,
        NSOpenGLPFAStencilSize,	8,
        NSOpenGLPFAOpenGLProfile, NSOpenGLProfileVersion3_2Core,
        0
    };

    NSOpenGLPixelFormat*  format= [[NSOpenGLPixelFormat alloc] initWithAttributes:attr];
    self= [super initWithFrame:frameRect pixelFormat:format];

    if( self ){

        // (1) Retina 対応
        [self setWantsBestResolutionOpenGLSurface:YES];

        mpTimer= [NSTimer timerWithTimeInterval:1.0/60.0
            target:self
            selector:@selector(render)
            userInfo:self
            repeats:true];
        if( mpTimer ){
            [[NSRunLoop currentRunLoop] addTimer:mpTimer forMode:NSRunLoopCommonModes];
        }
    }
    format= nil;
    return  self;
}

- (void)prepareOpenGL
{
    [super prepareOpenGL];

    GLint  vsync= GL_TRUE;
    [[self openGLContext] setValues:&vsync forParameter:NSOpenGLCPSwapInterval];

    [[self openGLContext] makeCurrentContext];

    // 〜 (2) OpenGL 初期化
}

- (void)update
{
    [super update];
}

- (void)reshape
{
    [super reshape];

    NSRect  brect= [self bounds];
    // (1.1) Retina 対応
    NSRect  rrect= [self convertRectToBacking:brect];

    float   width= rrect.size.width;
    float   height= rrect.size.height;

    // 〜 (3) screen サイズ設定など

}

- (void)drawRect:(NSRect)rect
{
}

- (void)render
{
    [[self openGLContext] makeCurrentContext];

    // 〜 (4) OpenGL の描画

    [[self openGLContext] flushBuffer];
}

- (BOOL)isOpaque
{
    return  YES;
}
Buffer Object の作成や Shader のコンパイルは (2) で行います。
(4) が実際の描画です。 glClear() 〜 glDrawElements() など。
(3) は Window のリサイズに合わせて Viewport を再設定し、
必要に応じて Projection Matrix 等を作り直します。
Retina Display に対応するには (1) の
[self setWantsBestResolutionOpenGLSurface:YES]
を追加します。
この場合 OpenGL からは 4 倍の解像度に見えることになります。
resize 時もサイズ調整が必要で、(1.1) の
[self convertRectToBacking:brect] が変換を行っています。
同じように Mouse Event 等の座標を GL 座標に合わせるには
[self convertPointToBacking:pos] を使います。
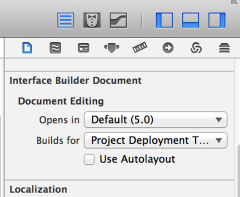
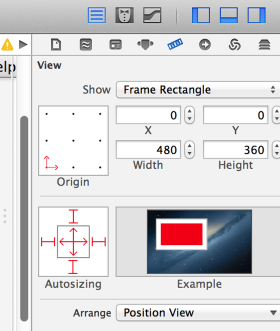
当初 Window の Resize に GLView が追従してきませんでした。
設定を比べた結果、Use Autolayout を外すと View の Autosizing を
設定できるようになりました。
↓
wgl/egl のような初期設定がなく NSOpenGLView は非常に簡単でした。
ただし initWithFrame の Profile 指定にあるように OS X 10.8
では OpenGL 3.2 までしか対応していないようです。
NSOpenGLProfileVersion3_2Core は NSOpenGL.h で定義されています。
10.9 から OpenGL 4 対応になるらしいので、GL4 の新しい
機能を使うには OS のサポートを待つ必要があります。
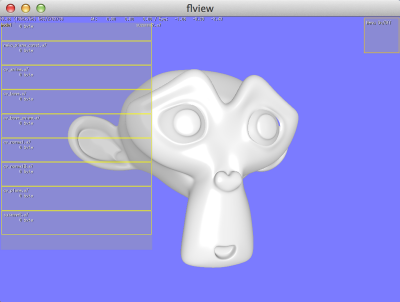
以前 Nexus 7 (Ubuntu) で動かしていたプログラム↓も移植できました。